FAQs

Seeking an answer to your question?

This section is dedicated to providing answers to some of the frequently asked questions

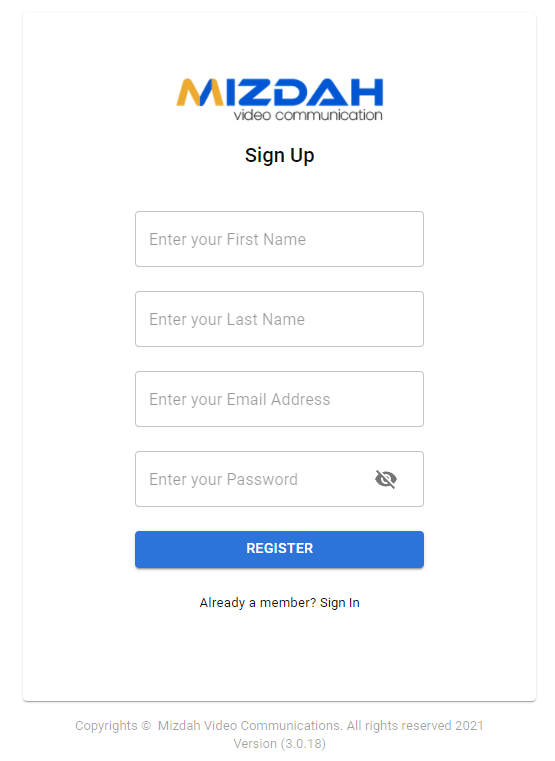
To register on MIZDAH, follow the following steps:

  1. Go to the main screen of the MIZDAH.
  2. Click on the ‘Sign Up’ option.
  3. Mizdah web app login page

  4. A new page will open up.
  5. Fill the required information i.e. name, address, city, state/province, phone number, email address, password, confirm password
  6. Click on the yellow ‘Register’ button.
  7. Congratulations! Your account on MIZDAH is created.

  1. Go to the main screen of the MIZDAH.
  2. Write down your email and password.
  3. Click on the blue colored ‘Sign In’ button.
  4. Mizdah web app login page

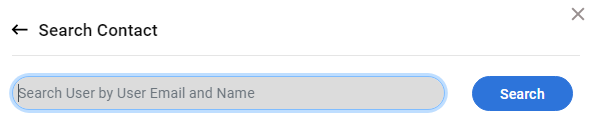
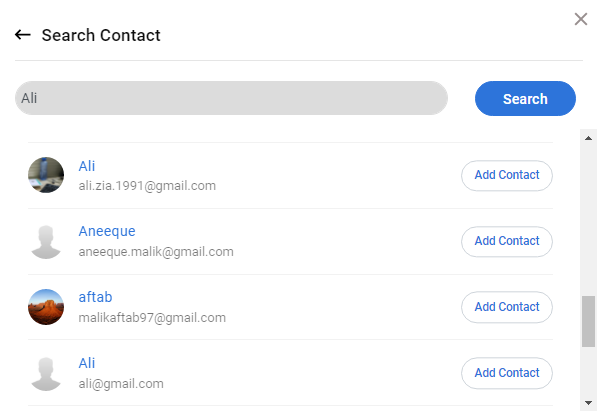
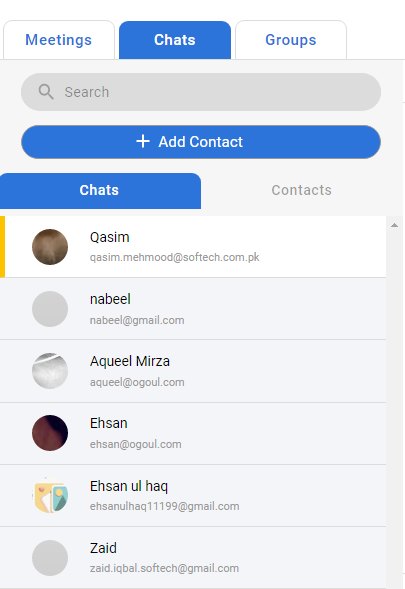
It is very convenient to add contacts in MIZDAH and start a meeting with them.

  1. Click on the ‘Chats’ option.
  2. Click on the ‘Add Contact’ option.
  3. Mizdah web app add contact screen

  4. Search the name of the user from the given search bar.
  5. You can either search other users from their username or by email address.
  6. Mizdah web app search contact screen

  7. After searching the user, a new screen will open up.
  8. It will show all the users with that name.
  9. Click on the ‘Add Contact’ button and the user will be added as soon as they accept your friend request.
  10. Mizdah web app search result screen

To view friend requests, follow the following steps:

  1. Click on the yellow icon on the top right of the screen.
  2. mizdah web app contact request

  3. It will show all the notifications who has sent you friend request, and who has accepted your friend request.
  4. mizdah web app contact requests

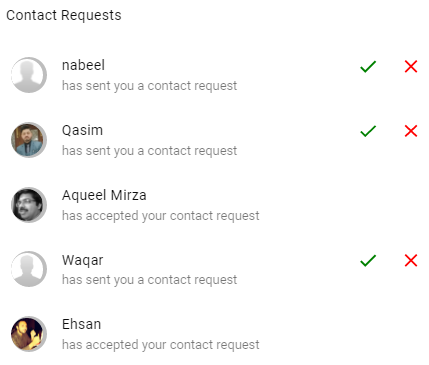
Users are allowed to accept or reject the friend requests of other users. To accept or reject the friend requests. Follow the following steps:

  1. Click on the yellow icon on the top right of the screen.
  2. mizdah web app contact request

  3. It will show all the notifications who has sent you friend request, and who has accepted your friend request.
  4. Click on the green ‘tick’ to accept the request and in case you want to reject someone’s friend request, click on the red color ‘cross’ sign.
  5. mizdah web app contact requests

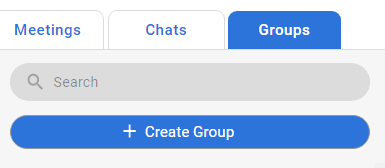
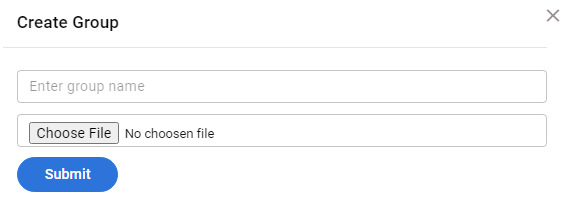
Users on Mizdah can create a group and add participants to it for collective communicate. To create a group, follow the following steps:

  1. From the top left of the screen, click on the ‘Groups’ option.
  2. Click on the ‘Create Group’ button.
  3. Mizdah web app group screen

  4. Enter the username for the group.
  5. Choose file for the display from the device and click on the blue colored ‘Submit’ button.
  6. Mizdah web app create group screen

To send a message on MIZDAH, follow the following steps:

  1. Go to the ‘chats’ from the main page.
  2. Click on the user whom you want to send a message.
  3. mizdah web app message screen

  4. Type your message in the given space.
  5. Then click on the blue ‘Send’ icon.
  6. mizdah web app send message

MIZDAH allows you to send files in any form whether in audio, video or other document forms. To share a file on MIZDAH, follow the following steps:

  1. Go to the chats from the main page.
  2. Click on the user whom you want to send a file.
  3. mizdah web app message screen

  4. Click on the ‘clip’ option with the send button.
  5. It will open up all the data from your device.
  6. Choose the file you want to send and click on the blue colored ‘arrow’ icon.
  7. mizdah web app send message

Mizdah allows editing user profile, to edit user profile. Follow the following steps:

  1. Click on the downward arrow from the top right of the screen next to username.
  2. mizdah web app profile

  3. Click on the ‘Profile’ option from the screen.
  4. Edit any information from the page.
  5. mizdah web app profile screen

  6. Then click on the blue colored ‘Update’ button.

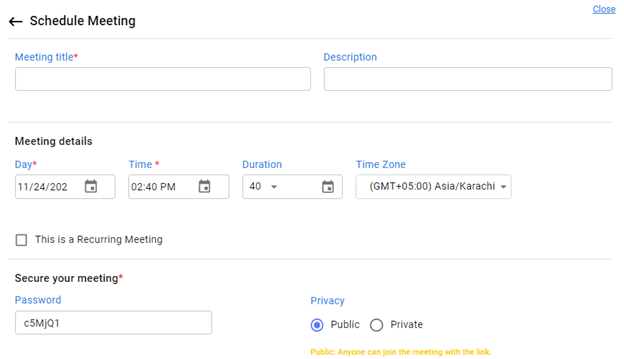
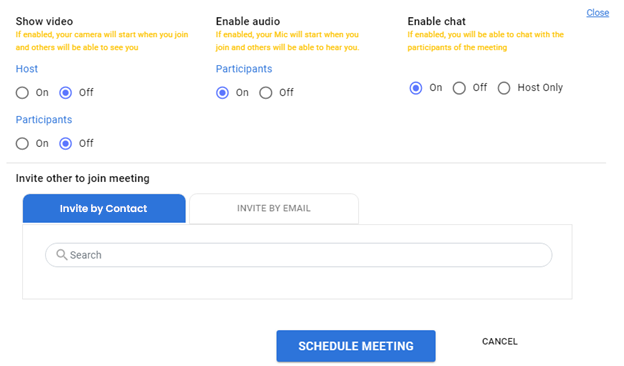
It is very convenient to schedule a meeting on Mizdah. To schedule a meeting, follow the following steps:

  1. Click on the ‘Schedule Meeting’ button from the top right of the screen.
  2. mizdah web app schedule meeting screen

  3. A new page will open in front of you. Fill up all the required options.
  4. Enter the ‘Meeting Title’ and add some description in the field of ‘description’.
  5. Add Meeting Details, by selecting day, time, time duration, and time zone.
  6. Select the privacy setting according to the need, i.e. select ‘Public’ or ‘Private’.
  7. mizdah web app schedule meeting

  8. Now select the setting to turn on or turn off the video, audio, chat, and participants for the meeting.
  9. Invite the other people to the meeting. There are two options to invite people to the meeting, first is to invite them by contact and the second by email.
  10. After making all the settings and selecting options according to your need, click on the ‘Schedule Meeting’.
  11. mizdah web app schedule meeting

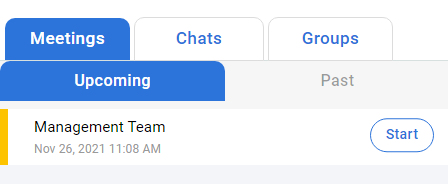
MIZDAH allows its users to start a meeting. To start a meeting, firstly schedule the meeting and then the screen will start giving you the option to start a meeting.

  1. Click on the ‘Schedule Meeting’ button from the top right of the screen.
  2. mizdah web app schedule meeting screen

  3. A new page will open in front of you. Fill up all the required options.
  4. Enter the ‘Meeting Title’ and add some description in the field of ‘description’.
  5. Add Meeting Details, by selecting day, time, time duration, and time zone.
  6. Select the privacy setting according to the need, i.e. select ‘Public’ or ‘Private’.
  7. mizdah web app schedule meeting

  8. Now select the setting to turn on or turn off the video, audio, chat, and participants for the meeting.
  9. Invite the other people to the meeting. There are two options to invite people to the meeting, first is to invite them by contact and the second by email.
  10. After making all the settings and selecting options according to your need, click on the ‘Schedule Meeting’.
  11. mizdah web app schedule meeting

  12. Now go to the top left of the screen and click on ‘Meetings’ button.
  13. There will be two options under ‘Meetings’ i.e. Upcoming and Past.
  14. Click on the ‘Upcoming’ button, it will show you the ‘Scheduled Meeting’, click on the blue colored ‘Start’ button to start the meeting.
  15. mizdah web app start meeting

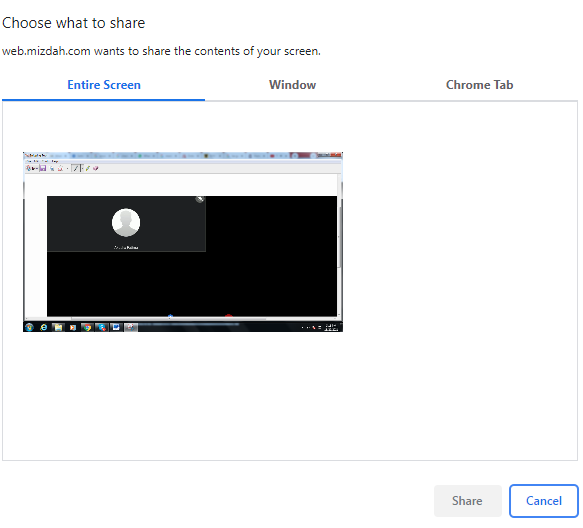
In meetings, you are allowed to share your screen with the other participants present in the meeting. To share your screen, follow the following steps:

  1. Click on the ‘Schedule Meeting’ button from the top right of the screen.
  2. mizdah web app schedule meeting screen

  3. A new page will open in front of you. Fill up all the required options.
  4. Enter the ‘Meeting Title’ and add some description in the field of ‘description’.
  5. Add Meeting Details, by selecting day, time, time duration, and time zone.
  6. Select the privacy setting according to the need, i.e. select ‘Public’ or ‘Private’.
  7. mizdah web app schedule meeting

  8. Now select the setting to turn on or turn off the video, audio, chat, and participants for the meeting.
  9. Invite the other people to the meeting. There are two options to invite people to the meeting, first is to invite them by contact and the second by email.
  10. After making all the settings and selecting options according to your need, click on the ‘Schedule Meeting’.
  11. mizdah web app schedule meeting

  12. Now go to the top left of the screen and click on ‘Meetings’ button.
  13. There will be two options under ‘Meetings’ i.e. Upcoming and Past.
  14. Click on the ‘Upcoming’ button, it will show you the ‘Scheduled Meeting’, click on the blue colored ‘Start’ button to start the meeting.
  15. mizdah web app start meeting

  16. Now click on the ‘Share Screen’ button from the Meeting Screen.
  17. mizdah web app start meeting

  18. A new screen will open up, asking for the content you want to share.
  19. Choose the screen you want to share with the participants’ i.e. Your Entire Screen, Window or Chrome Tab.
  20. Click on the ‘Share’ button at the right corner of the page.
  21. Screen will start sharing with the participants.
  22. mizdah web app meeting share screen

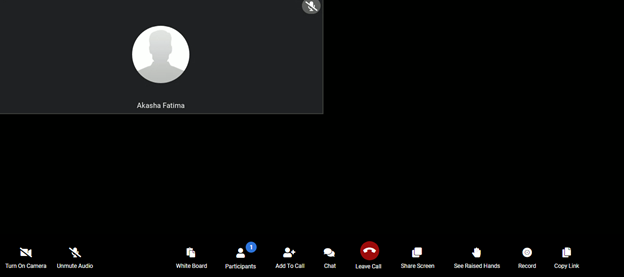
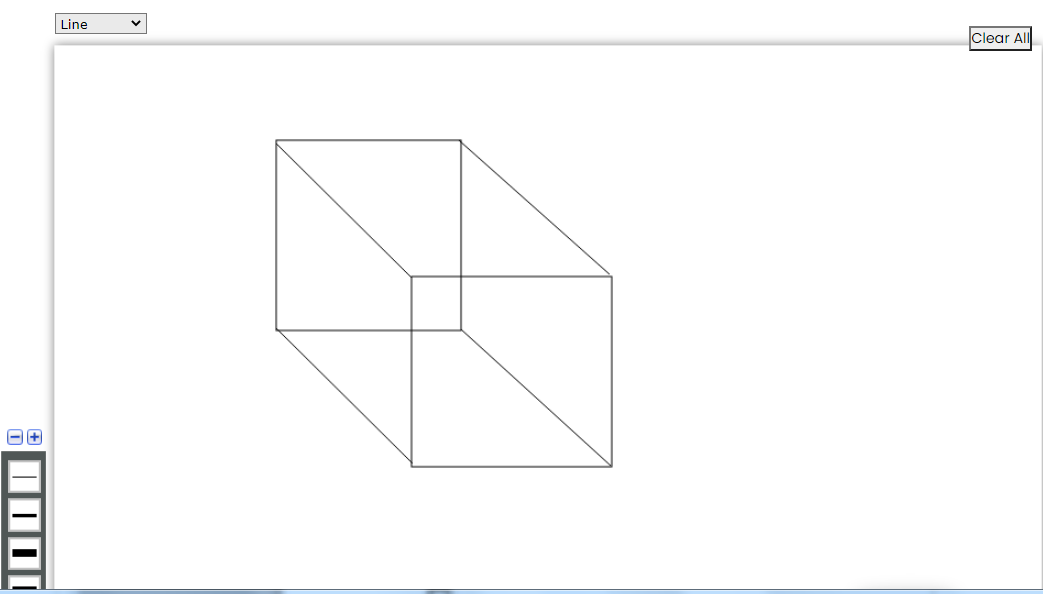
MIZDAH enables its users to use whiteboard during meeting to explain anything. To use whiteboard, follow the following steps:

  1. Click on the ‘Schedule Meeting’ button from the top right of the screen.
  2. mizdah web app schedule meeting screen

  3. A new page will open in front of you. Fill up all the required options.
  4. Enter the ‘Meeting Title’ and add some description in the field of ‘description’.
  5. Add Meeting Details, by selecting day, time, time duration, and time zone.
  6. Select the privacy setting according to the need, i.e. select ‘Public’ or ‘Private’.
  7. mizdah web app schedule meeting

  8. Now select the setting to turn on or turn off the video, audio, chat, and participants for the meeting.
  9. Invite the other people to the meeting. There are two options to invite people to the meeting, first is to invite them by contact and the second by email.
  10. After making all the settings and selecting options according to your need, click on the ‘Schedule Meeting’.
  11. mizdah web app schedule meeting

  12. Now go to the top left of the screen and click on ‘Meetings’ button.
  13. There will be two options under ‘Meetings’ i.e. Upcoming and Past.
  14. Click on the ‘Upcoming’ button, it will show you the ‘Scheduled Meeting’, click on the blue colored ‘Start’ button to start the meeting.
  15. mizdah web app start meeting

  16. Now click on the ‘Whiteboard’ button from the Meeting Screen.
  17. mizdah web app start meeting

  18. A new screen will open up, showing a whiteboard.
  19. Choose the chalk, line, rectangular or other options given on the screen.
  20. mizdah web app white board

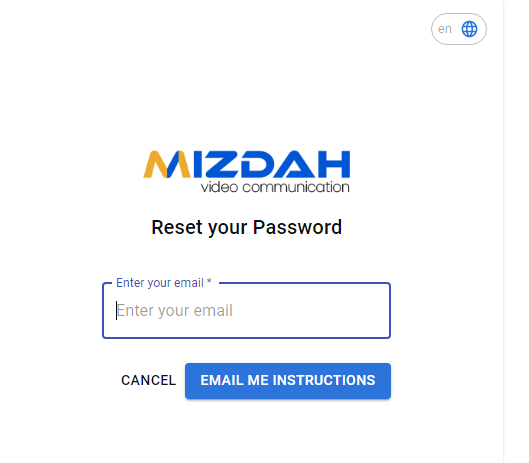
If a user of Mizdah forgets password, they can easily recover it.

  1. Go to the main screen of the ‘MIZDAH’.
  2. Click on the ‘Forgot Password’ option.
  3. Mizdah web app login page

  4. A new page will open, showing settings to reset the password.
  5. Enter the email on which the MIZDAH account is registered.
  6. Click on the ‘Email Me Instructions’ button.
  7. Instructions to set a new password will be sent on the email.
  8. Mizdah web app reset password screen

Contact Us

Still have question?

Can’t find the answer you’re looking for? Please chat to our friendly team.

Get in touch